How To Add Google Tag Manager To Your Website
To start tracking your website’s performance and unlock the ability to add do a lot more custom solutions, you just need to add a few lines of code to your website.
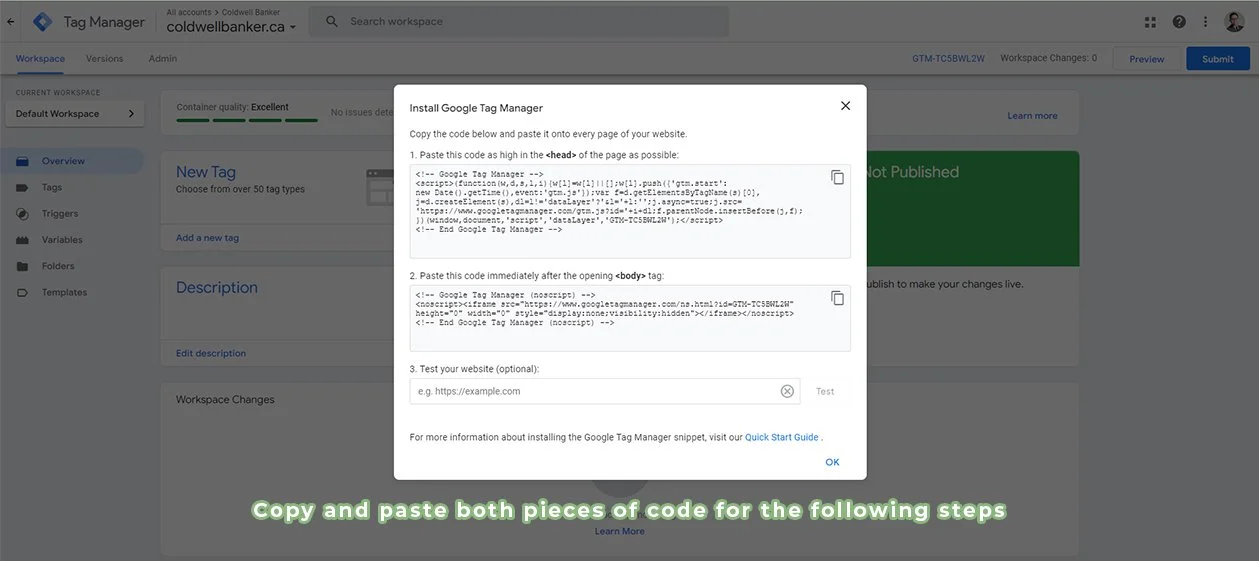
GTM Code looks something like this:
<!-- Google Tag Manager -->
<script>(function(w,d,s,l,i){w[l]=w[l]||[];w[l].push({'gtm.start':
new Date().getTime(),event:'gtm.js'});var f=d.getElementsByTagName(s)[0],
j=d.createElement(s),dl=l!='dataLayer'?'&l='+l:'';j.async=true;j.src=
'https://www.googletagmanager.com/gtm.js?id='+i+dl;f.parentNode.insertBefore(j,f);
})(window,document,'script','dataLayer','GTM-XXXXXXX');</script>
<!-- End Google Tag Manager -->

<!-- Google Tag Manager (noscript) -->
<noscript><iframe src="https://www.googletagmanager.com/ns.html?id=GTM-XXXXXXX"
height="0" width="0" style="display:none;visibility:hidden"></iframe></noscript>
<!-- End Google Tag Manager (noscript) -->
Each GTM code differs slightly as the GTM ID is different for every container (aka. GTM-XXXXXXX). Please ensure you use the GTM code provided by your Google Tag Manager container dashboard and not the one above.

How to add the GTM code to your website - CB Ignite
Step 1
Go to my.cbignite.ca and log in with your CB Ignite account
Step 2
In your website dashboard, navigate to Settings > Script Tag Settings

Step 3
Paste the GTM code into the textbox on the Script Tag Settings page, and click “Update”

That’s It!
Your website now has Google Tag Manager installed on it.