How to Setup the DDF Feed on Meta
Step 1: Create a New Catalog
1. Log in to your Meta Business Manager account
2. Click on “Settings” in the bottom left corner
3. Navigate down to “Accounts” then “Ad Accounts” and invite us to their Ad account
4. Same with “Pages”
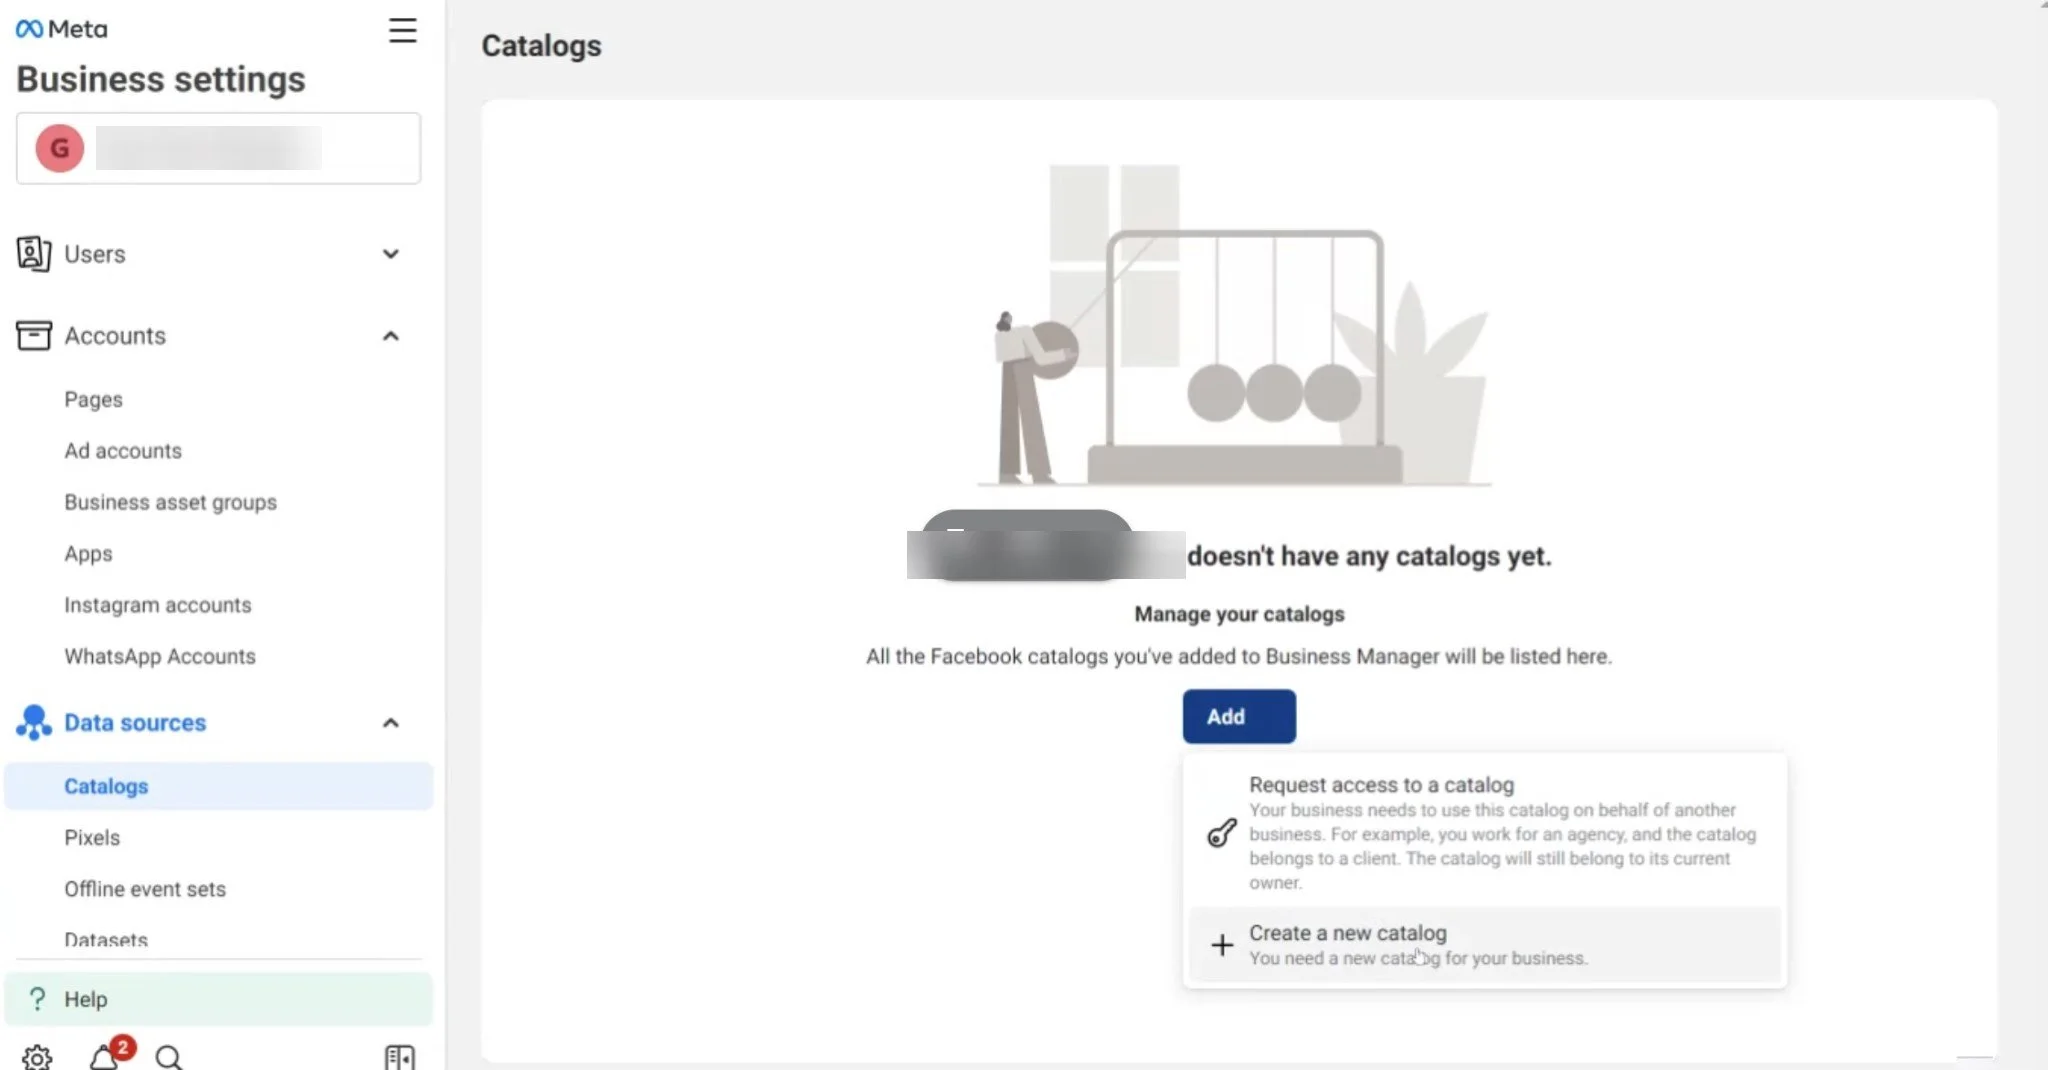
5. Navigate down to “Data Sources” then “Catalogs”, then click “Add”

6. Choose the option to “Create a new catalog”
7. Enter the catalog info and click “Create catalog”
For Type, choose “Home Listings”
For Catalog name, include your/your organization’s name and “BNM DDF”

8. Choose your account from the left sidebar, and give yourself “Admin” permissions or the highest permissions possible

Note: At this time we don't support set up or configuration of pixels with the catalog. These steps can be ignored for now, below it is depicted that the client is electing to connect their pixel, we do not support or troubleshoot any of this at the moment.

9. Choose to assign partners through “Business ID” and enter the Benchmetrics Meta Business ID:
1097906611119825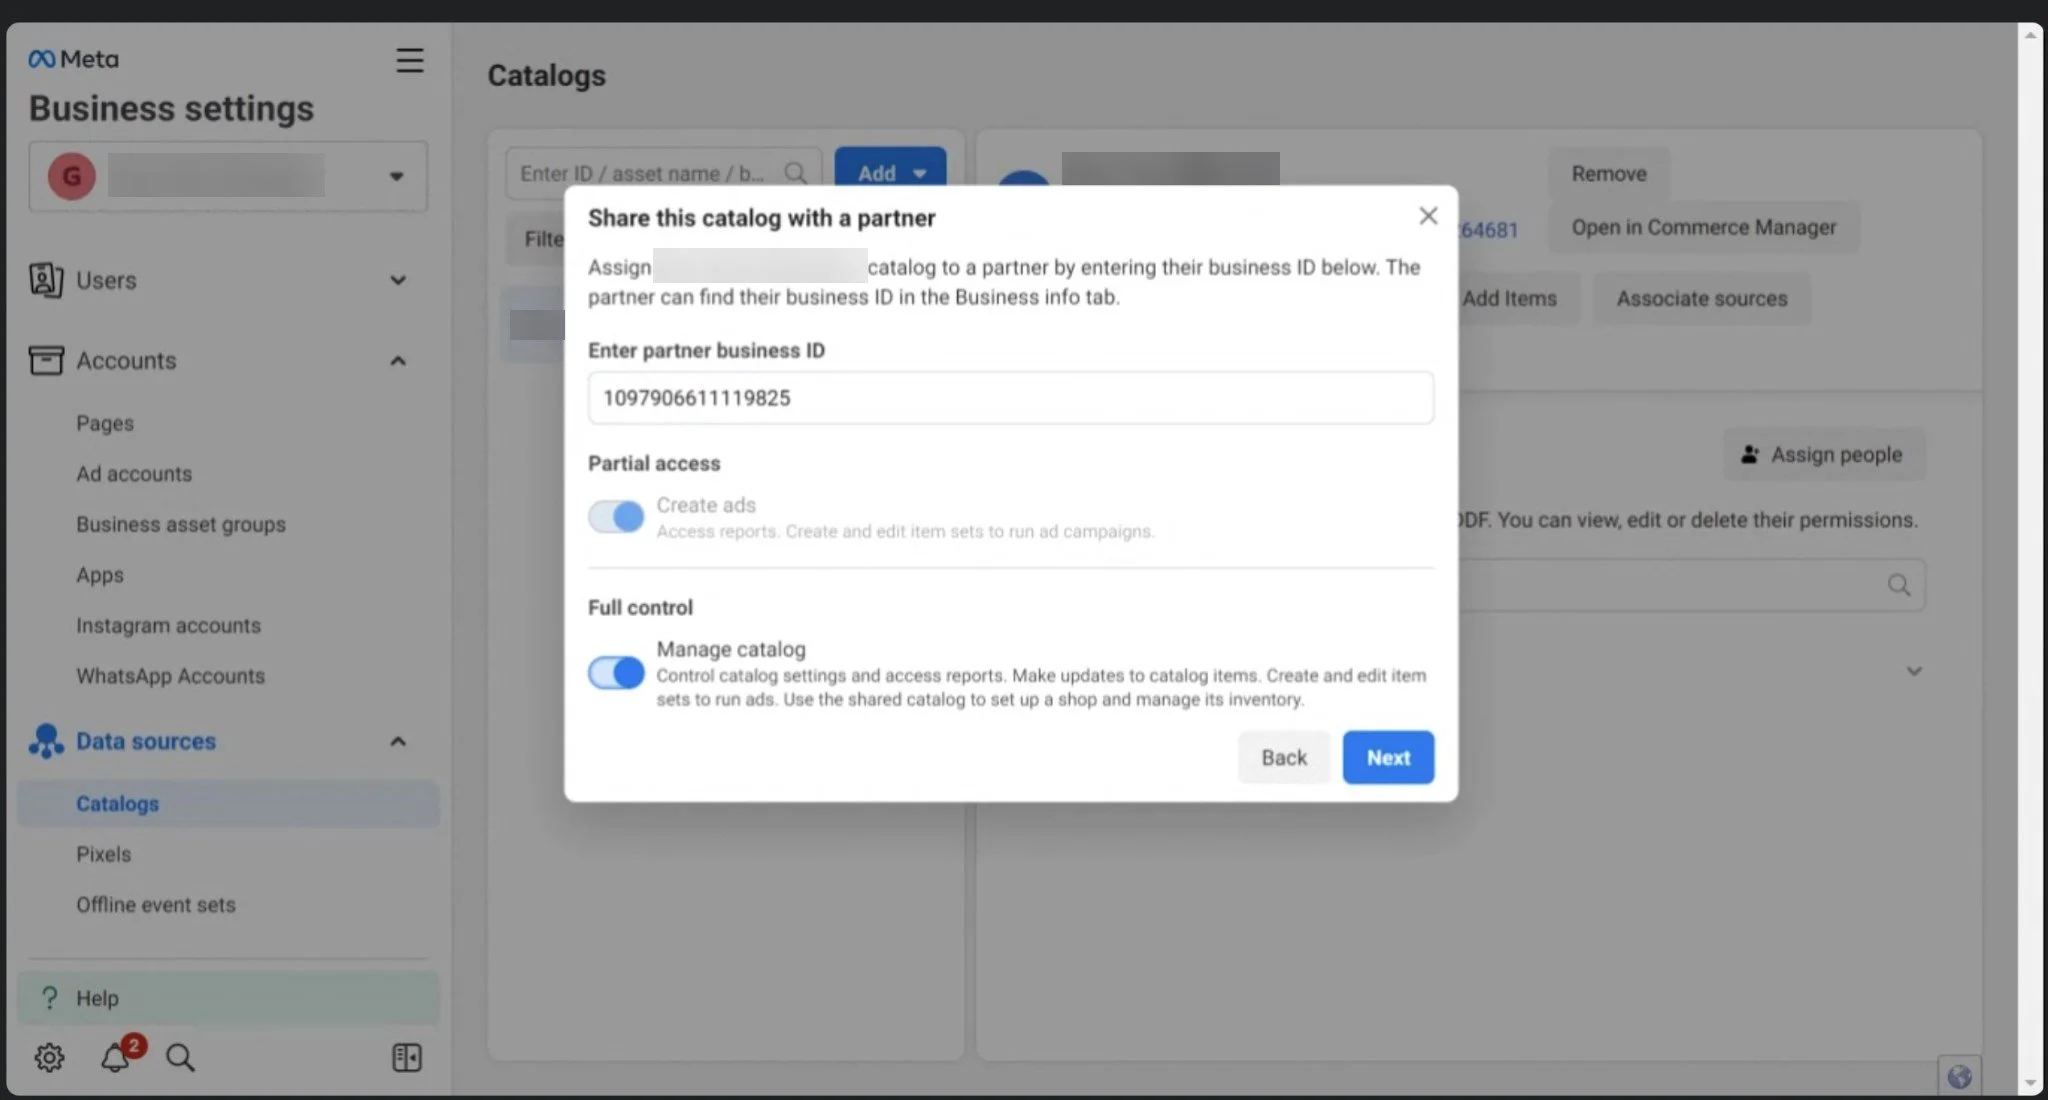
10. Click the toggle the “Manage catalog” under “Full control” and click “Next”
Step 2: Create the Campaign
1. Go to Meta Ad Manager and click the green “+ Create” button to create a new campaign.
2. Choose “Leads” as the campaign objective
3. Choose “Manual leads campaign”

4. Choose “Housing” as the Special ad category for the campaign, and then move on to the “Ad Set” option on the left

5. Select your Facebook page

6. At the moment there will likely not be any product sets. For the first campaign, select “All Products”, please note we will show you how to create a product set in the second campaign setup further below.

Tip: Because Inventory dynamically flows into ads based on “Product Set” filters, we encourage you to build multiple campaigns/ad sets as needed so they can conveniently turn campaigns on and off as needed.
7. Set initial budget for the first campaign to $10 but you can adjust it later.
Reminder: the budgets are set at the ad set level and if they duplicate an ad set they will need to be mindful that they don't double their budget unintentionally.

8. Select the location(s) to reach people living in or recently in this location.

Note: By default the age group is 18-65+, DO NOT exclude any age groups/genders as this will be flagged as discriminatory.
9. Under “Detailed Targeting” settings, here are some good keywords that you can enter:
Mortgage calculator (credit & lending)
Mortgage loans (banking)
Pre-qualification (lending)
Real estate investing (investing)
Real property (real estate)
Residential area (real estate)
Single-family detached home (real estate)
Note: Keep in mind that advertisers may want to avoid “New Home Buyers” also, avoid all “Rent” terms. We find less is often more here. Here are some generic keywords of interest:

10. Click ‘Next’ to move on to the “Ad” section. Create an Ad Name, then select your Facebook (as well as Instagram if an option)
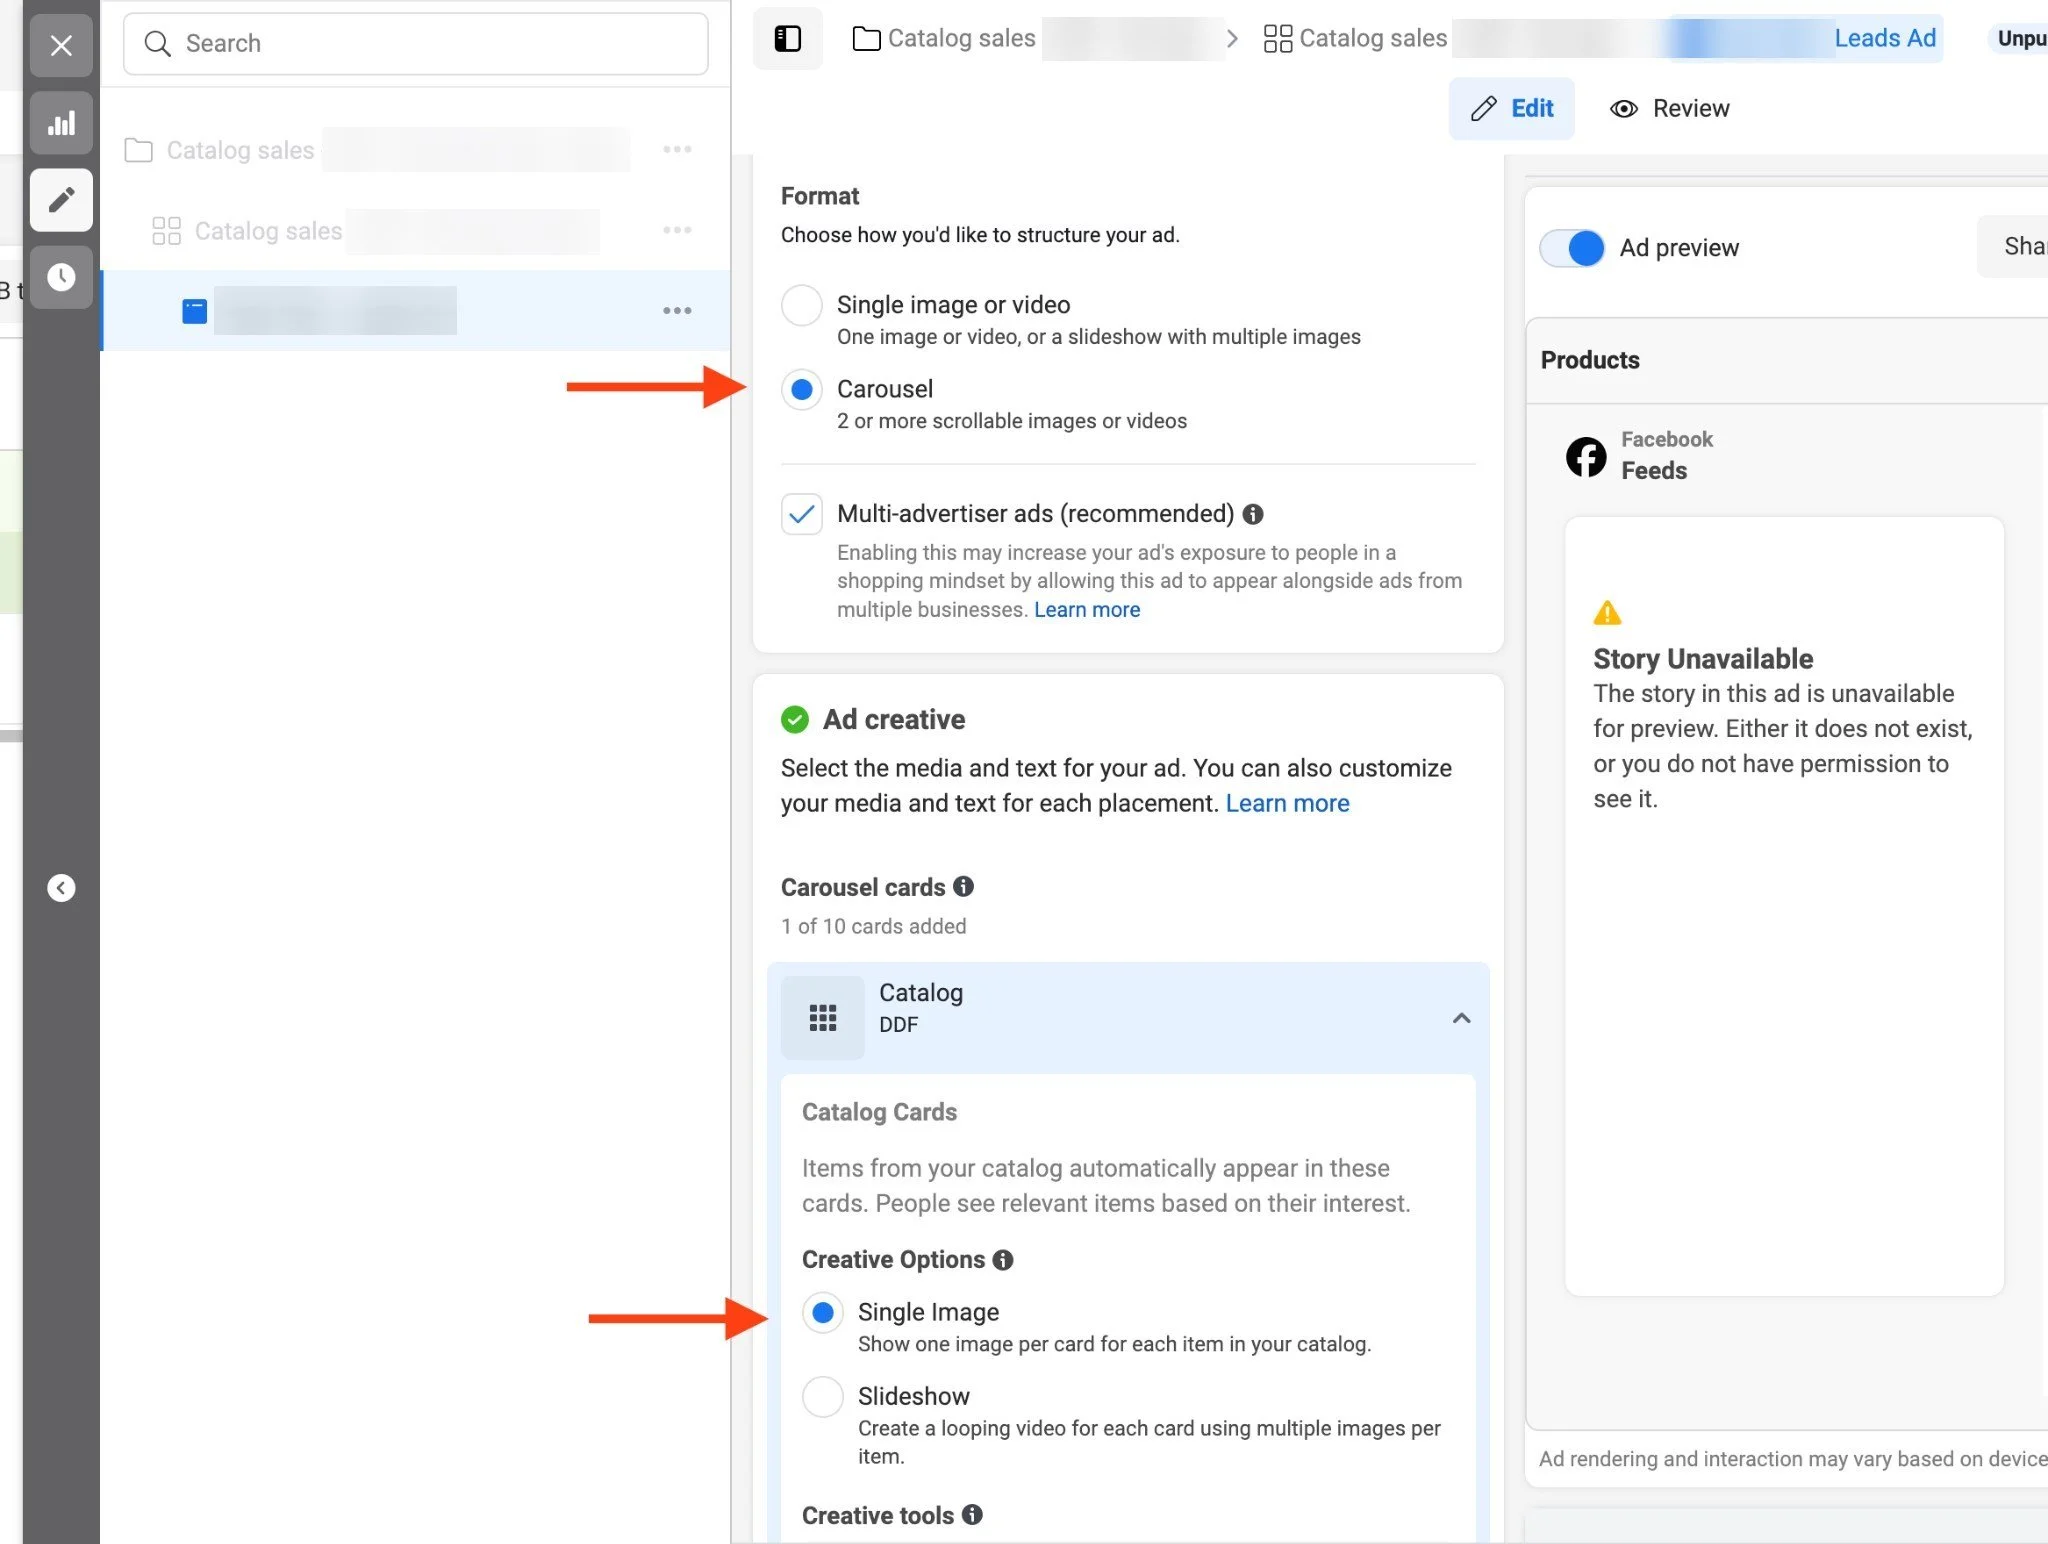
11. Under Format select “Carousel”, and select “Single Image” under Ad Creative.
12. Below under Headline, select “Price” , “City” , “custom_Label_0”. Then in the Feed Link Description select “custom_label_0”. Finally, under Primary Text select “Description” + a description of the ad, as an example ours is “ - The Newest Listings in the Greater Vancouver Area!”

13. Under the Call to action, select “Learn more”, and click "Create form” under Destination to create an instant form

14. Give the instant form a name, and use this text for the intro:
We will send you info regarding this and other listings of interest & mortgage rates.
15. Enter this information for the 1st multiple-choice question:
Question 1
What would  you like to know?

Answers
I would like to request more info
I would like to book a showing
I would like more photos
Where is the property located
16. Enter this information for the 2nd multiple-choice question:
Question 2
If you find the right property, when would you like to buy?

Answers
As soon as possible
1 - 3 Months
3 - 6 Months
6 - 12 Months
12+ Months
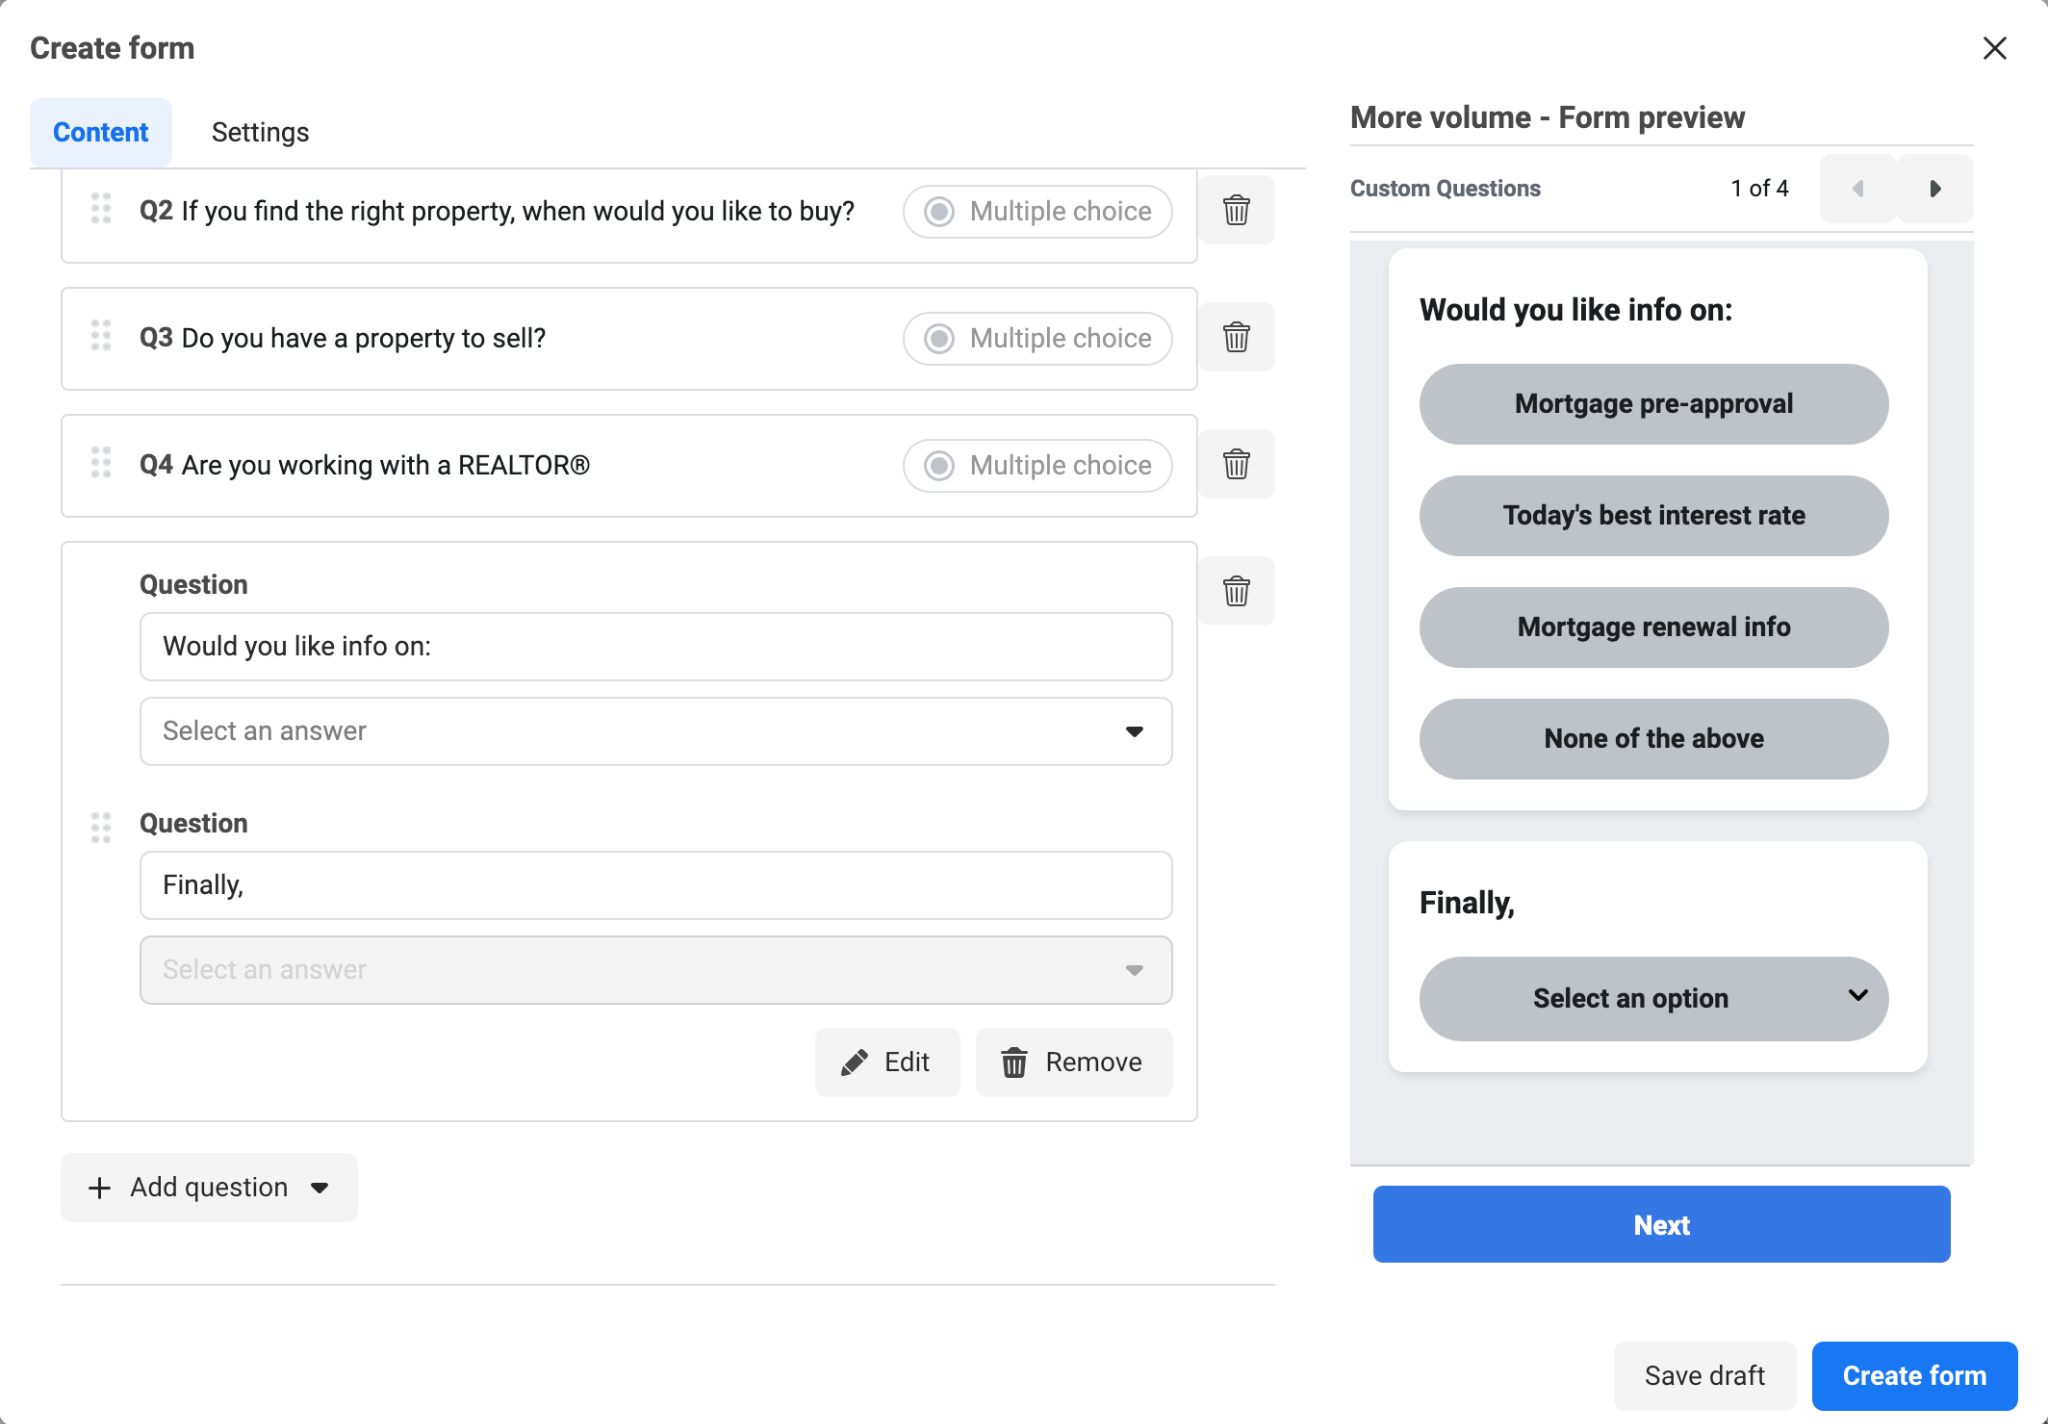
17. Enter this information for the 3rd multiple-choice question:
Question 3
Do you have a property to sell?

Answers
Yes
No
No, but I do have a down payment
18. Enter this information for the 4th multiple-choice question:
Question 4
Are you working with a REALTOR©

Answers
Yes
No
19. Question 5 is a conditional question. and it requires you to upload a .csv file found here:
20. For the prefill questions, you’ll want to include Email, Full Name, and Phone Number

21. Include a URL link to your website’s privacy policy

22. Lastly, include this message to your leads and click “Create Form”:
Headline
Thanks, you're all set.

Description
You can visit our website or exit the form now.
Note: 100% of your campaigns MUST be affiliated with the form you create.
Step 3: Create a 2nd Campaign
Note: For a second campaign, please do not duplicate but create a second campaign.
1. Go back to https://business.facebook.com/commerce/catalogs/ and create a set:

Note: Please see the screenshot below to understand the actual values mapped to the filters you see above.

2. Once you’ve created the “Set” you can go back to your ad campaign and select your new Product Set.
3. You should now be able to click on Preview Ad on the right hand side:


4. Once everything looks good on your end, you can hit “Publish” and your ad will be under review by Facebook. Once it’s been approved, you can toggle the Ad campaign “on/off” on the left-hand side of your campaign list.